Saturday, December 31, 2011

TUTORIAL - Kid's travel activity organisers

I made these activity packs back in September.  They were a desperate attempt to keep the kids busy on the plane.  I had no idea just how useful they would be.  We use them all the time.  They are very simple to make, here's how:


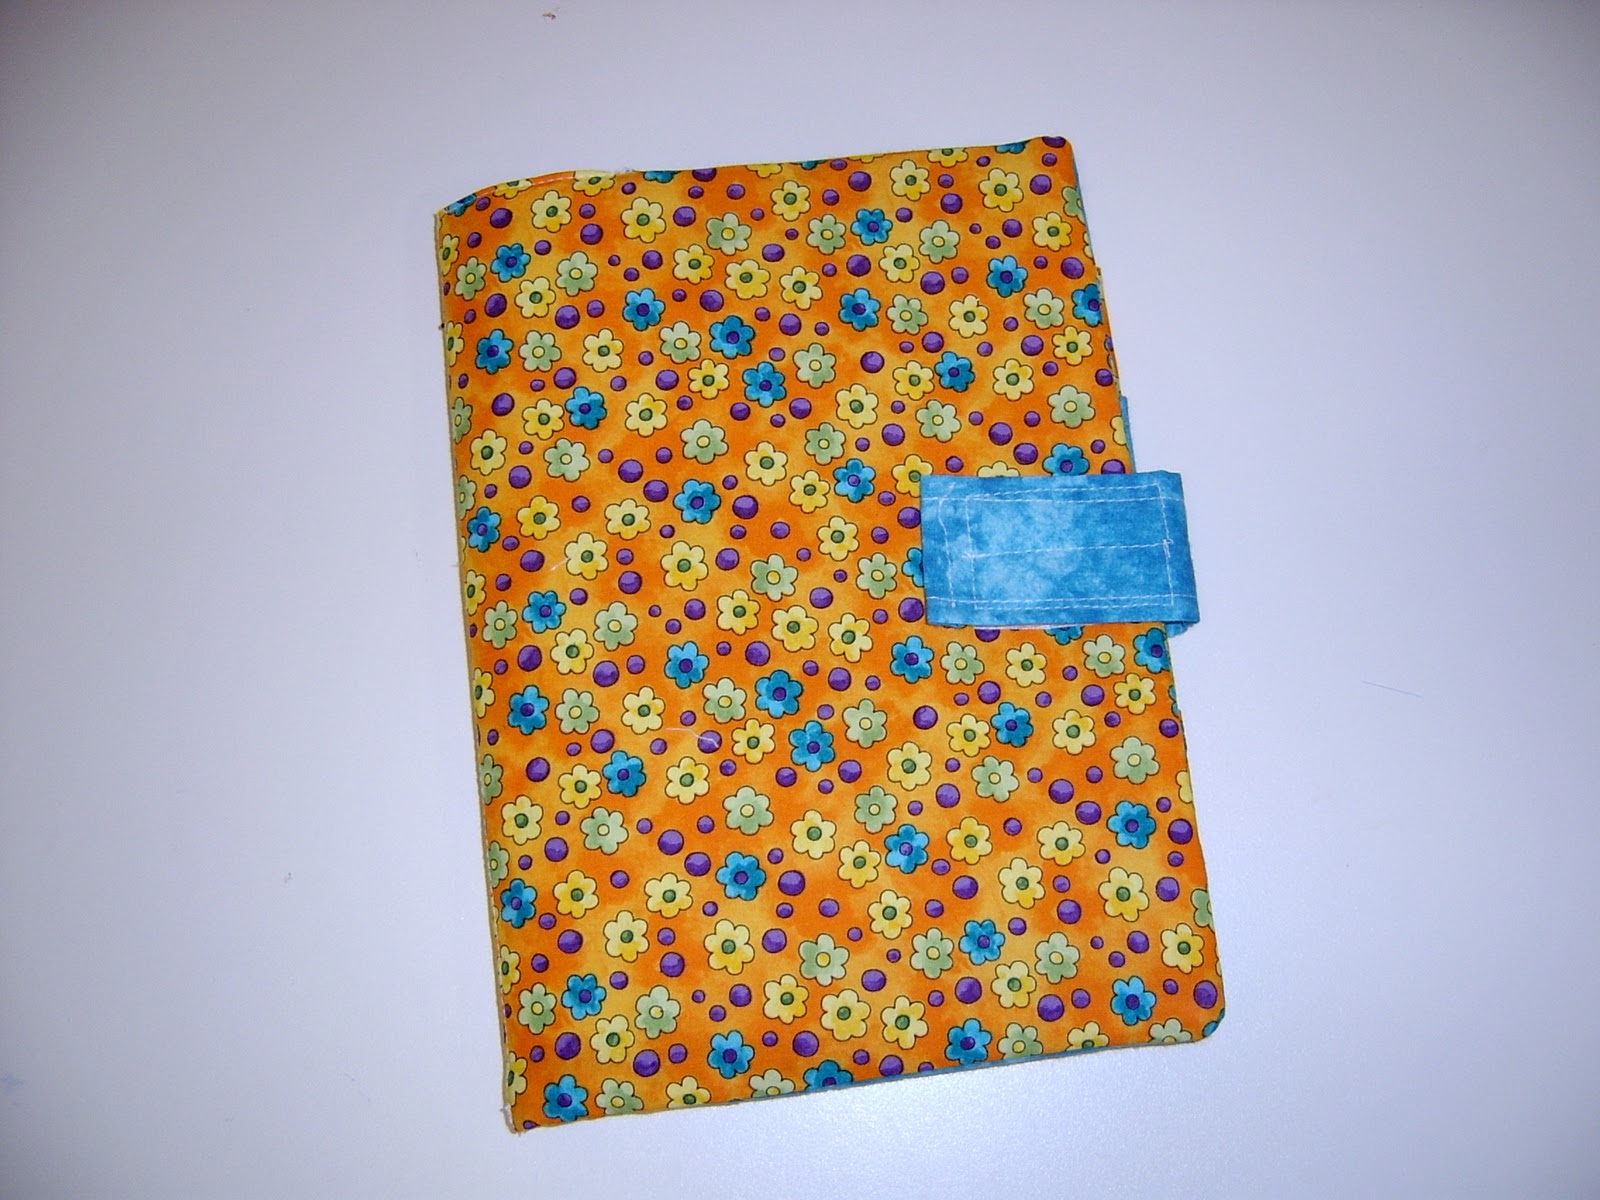
Decide how big/small you want your organiser to be.  I found a notebook I wanted to put in it and added 2 inches to each side.  The first rectangle you need to cut from your main fabric needs to be twice as big as this [the organiser is folded in half].

Pick a main fabric, and one or two contrasting fabrics.

I cut my front piece and lining piece according to my notebook measurement [plus 2 inches each side, and double the width].  The cut pocket strips that were the same width but 1 1/2 inches shorter than the last one.  Hem one long edge of your smaller strips [this will form the top of the pocket].

Lay the pockets one on top of the other and stitch down the centre to hold them together.

Fuse a fairly stiff interfacing to your outside cover piece.
 

Make a closure tab out of lining/scrap fabric.  Add velcro to the tab...
and to the cover:

Put the pocket pieces and cover right sides together, making sure your closure tab is pinned in the correct place inside this.  Stitch around the outside edge leaving a gap for turning.  Turn, press, and topstitch around the edge.


You are finished.  I made four different ones for my kids, and filled them with notebooks, stickers, books, pencils etc.  They have worked brilliantly on planes, while away on holidays, and at church.  I am considering making a slightly larger one for myself to carry things for me to do while I wait at school and dancing etc.

Wednesday, December 28, 2011

STRAWBERRY SHOPPING BAGS


I have been wanting to make my own strawberry shopping bags since I bought one a couple of years ago.  I am so thankful to Lier for her tutorial as it meant I didn't have to work out how to make them myself.  I made a dozen for Christmas gifts this year.  They looked so cute sitting all together in a bowl, and were very easy to sew.  It has been difficult to part with them.  Perhaps I will have to make some more for myself!

Saturday, December 24, 2011


God's love...


is bigger than it looks. 


Merry Christmas! 

Wednesday, December 21, 2011

HOMEMADE BARBIE CLOTHES

My niece is getting some lovely new Barbie clothes for Christmas.  She is 5 so she needs clothes that are easy to put on and take off.  So I googled free Barbie clothes patterns, printed the patterns and cut out some fabric scraps.

I have never sewn something so small and fiddly before... it was extremely satisfying to complete, but it's not the neatest job I've ever done.  At some stage I will need to make some outfits for my girls' Barbies, but that means 4 sets.  I think I'll have a break from Barbie outfits for a while!

Sunday, December 18, 2011

Sewing clothes is fun again.

During my absence from the blog world, I have rediscovered my love for garment sewing.  Being constantly frustrated with the lack of decent clothes in stores has helped me to start sewing again.  I have sewn clothes for all my children, myself, and others.  It has been so much fun, but of course the more I sew, the longer my 'to do' list seems to become!  This is an outfit I made for Miss 4, shorts and a swing top/pillowcase top.  I actually made two identical outfits, one for her and one for my niece, Miss 5.  It's really cute.

I haven't taken photos of the 9 pairs of shorts, 6 skirts, and one after-5 outfit I have made.  I guess I was too busy sewing and then we have been too busy wearing them.  At some stage I will take photos of the bridesmaid dresses that are progressing well. 

If you've never made your own clothes, don't be afraid of having a try.  It's really not that difficult.  Sometimes I use commercial patterns, sometimes I draft my own, sometimes I just cut into the fabric.  It really depends what I am making.  The main thing is to practice.  Start with some kid's clothes, they take less fabric and don't have to fit as well as adult's clothing.  But then move on to a basic skirt or something else for yourself.  You have control over the fabric, the style, and your clothes will be unique.

I have been sewing for over 20 years.  I am so thankful I learnt to sew a long time ago.  You would not believe the number of times I have had to unpick a seam, or throw something out because I had stuffed up.  I still unpick regularly.  But with each mistake, I learn something else, and hopefully won't make that same mistake again.  Making mistakes and unpicking is part of sewing, especially garment sewing.  But I have learnt to embrace that, rather than throw in the towel when I do make a mistake.  Sewing clothes is fun again.

Friday, December 16, 2011

POTATO BAGS


Mr E had wanted to grow potatoes for some time now. But not just any potatoes. Kipflers, Dutch creams, cranberry reds... varieties you can no longer buy at the supermarket. We did some research and discovered you cannot plant potatoes in the same place twice. This can become an issue in the home garden. The answer is to grow potatoes in bags.

I made these bags from a roll of weed mat bought at the local hardware store. I cut lengths from the roll and sewed up the base and sides [with my Singer 'workhorse' machine, NOT my big beautiful Pfaff]. All done in an hour or two, and ready to be filled with compost/potting mix and seed potatoes. 

The harvest was not quite as prolific as we'd hoped, we suspect mostly because we forgot them for a week or more in the heat and didn't water the poor plants.  But the potatoes we did get to eat - WOW.  So yummy.

We will definitely be doing this again as soon as autumn is here  [too hot and humid here in subtropical Queensland to grow potatoes over summer].

Wednesday, December 14, 2011

I'M BACK!!!


I have decided that you can tell how busy I am by how often I post on this blog.  Since my last post [which I apologise it was a LOOOOOOOONG time ago] I have been so busy living life that the blog was just too much for me to try to manage. 
Now, it is nearly Christmas, the summer holidays are upon us, and I realised that I not only have a blog, but a heap of photos of things I've been up to [and a whole lot I didn't take photos of I may still write about if I can recall anything about them].
So readers, if there are any of you left, thankyou for your patience.  I am back.  I cannot guarantee how regularly I will be posting, as I intend to PLAY with my children during the holidays, but I will try to be more faithful in keeping a record of that play.

Wednesday, September 21, 2011

KID'S TRAVEL ACTIVITY ORGANISERS

I remember going places as a child with my 'busy bag'. Mum put together a bag for myself and my sister that contained a little doll, pencils and paper, a puzzle, and I forget what else. We loved playing with them: on holidays, at people's houses, at church. Sometimes we'd ask Mum to get them out for us to play with at home.
When preparing for our recent trip to Sydney I decided that we needed a variation of this for on the plane.  All four girls would need to be occupied for a considerable time, with only their tray table to work on.  Here is what I made up for them:

I filled them with notebooks, puzzle/colouring books, stickers, a new book [picture book or novel], a few coloured pencils, a lead pencil and rubber.  They were a hit.  I whipped up four over two evenings, no sweat.  And the best part is, they can be used over and over at church, when waiting in the car, other holidays. 

I will post a tutorial soon.  I'm thinking I may need my own, it's just the right size to fit in my bag, and better than any organiser I've ever owned.  You could customize it with pockets etc. to suit your own needs.


Monday, September 19, 2011

THE GREAT WEED BATTLE

At the moment I am at war.  It's not pretty.  This morning I suffered my first injury.  But I'll be back tomorrow to continue my advance.

6 or 7 weeks ago I began the long journey to getting my front garden from work site to garden.  I planted 35 baby rose bushes with the intention of them becoming a hedge in a year or three.  Then we got sick.  I mean, all my girls and me.  Really sick.  Influenza.  It was unpleasant and has taken until now for us to all be over it.

During that time we have had a smidgen of rain, the roses got a bit of water from a hose if Mr E or I remembered, and it has become spring.  Beautiful, sunny warm days and the nights are warming up too. 

Being a pretend gardener [I'm VERY new to all this] I had thought I would come back and mulch my new babies in the school holidays which is now, and all would be well, no weeds, no problems.

Ahem.

I do not like weeds.   At all.

While I was pulling weeds and getting scratched by thorns and crawling around on all fours this morning a passing walker commented "I had no idea there were roses in there".

I have been out early attacking the weeds 3 mornings now.  I am not yet halfway.  This time I am mulching as I go.  On the up side, being outside in the garden between 5.30 and 6.30am is lovely, and a great opportunity to pray and think.

I have no doubt that the victory will be mine.  Hopefully soon.  Did I mention that I do not like weeds?


Thursday, September 15, 2011

Miss 2's birthday cake


Miss 2 is into dogs and puppies. Really into them. We don't have a dog. But she does have a stuffed dog teddy. He gets carried around the house and taken out in the car most days. Reading books containing dogs is also a favourite thing of hers to do. And each time we see a dog while out driving, or on tv, she gets really excited. For a little girl who doesn't talk yet, we know she loves dogs. So it was easy to decide what birthday cake to choose for her - Spot the dog.


I used my new favourite gluten free cake recipe: the gluten free madiera [pound] cake, but I made it with vanilla extract rather than orange. It was so delicious, that ALL OF THIS CAKE GOT CONSUMED within 2 days. Usually my birthday cakes get eaten for a day or two but I throw the rest away as it goes stale and yukky.


Tuesday, September 13, 2011

Heat Wheats - another UFO done [including tips for making your own]

I bought a bag of wheat from our local produce seller ages ago.  I had intended to make heat wheats, new heat packs. But like so many UFO's I never go there.  I was trying to find a place to put the large, rather in-the-way bag of wheat today, when I decided it would be quicker to make some up than try to find a home for the heavy bag of wheat.  I was right.

 This is a shoulder/neck heat pack.  My previous one was a lovely maroon corduroy, but it had seen better days.  Aren't these lovely cotton prints?  When feeling sore, I think they have the potential to bring a smile to my face.

Miss 8 also decided to help me out.  Here are the two that she made:
If you decide to make your own heat packs at home, there are a couple of tips I've learned over the years I've been making them:
1. Sewing channels every so often while filling your pack make it work better - you don't end up with all the wheat down one end.
2. Spritz with water or put a glass of water in the microwave when you heat it up.  Otherwise they could catch fire.  VERY IMPORTANT.
3. Add dried lavender with the wheat when filling for a lovely aroma when it's heated.
4. Make up in a few different shapes for the different purposes you need them.
5. They work really well as bed warmers in winter - instead of hot water bottles or electric blankets.  Make a soft pillowcase for one out of polar fleece you can throw over after it's warmed.  My kids sometimes cuddle them on a cold night!!

Sunday, September 11, 2011

FINISHING UFO'S

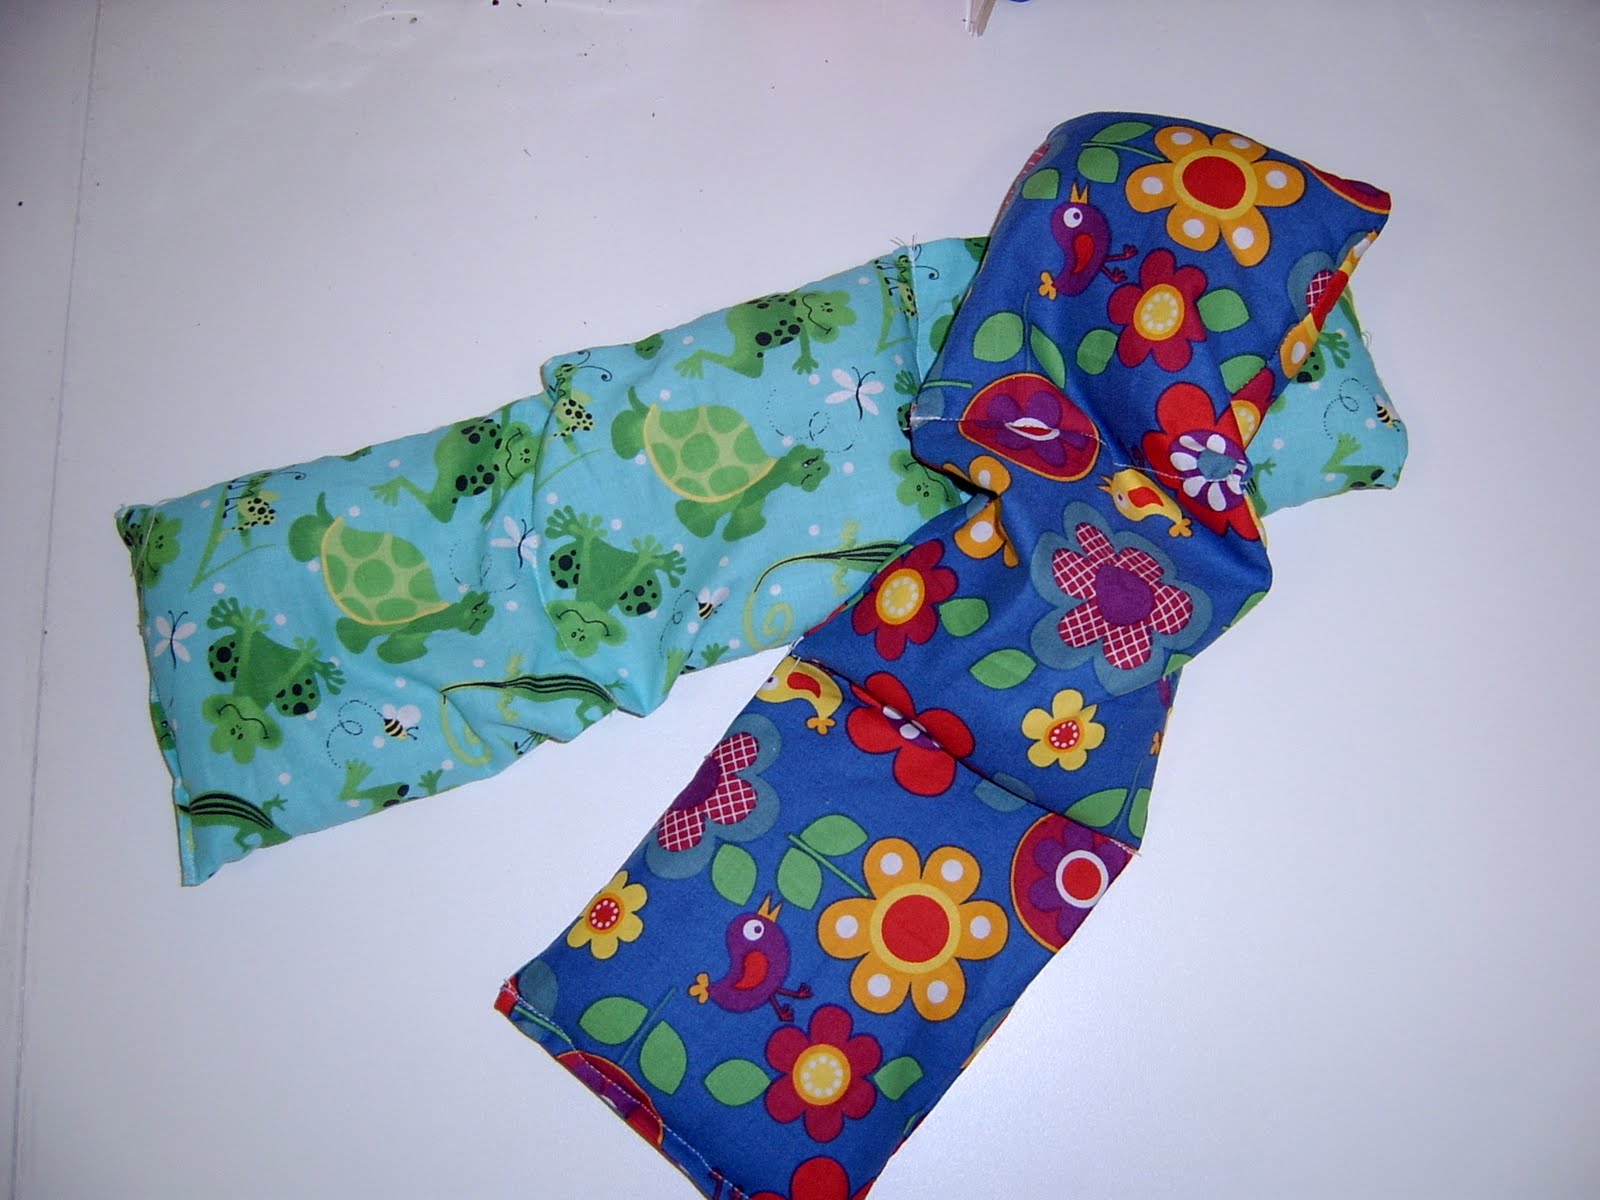
While moving into my 'new' sewing room, I found a huge number of UFO's I had stockpiled in different boxes in the shed. There is a huge amount of guilt associated with UFO's, and I did not want them hanging over my head as I started new projects in my new room. So I have been working hard at getting them out of the way. There were two bag-along bags I started out with last year, and never finished, one above, and this one here:

This bag has an alternate colourway on the other side:


It felt good to get these out of the way, they are stiffened with buckram, which I have never used before, so it was a great learning experience to learnn how to use it. I think I'm ready to use it to stiffen a hat brim now [which was my purpose for trying it in these bags].


Friday, September 9, 2011

Gluten free orange cakes

I thought I'd try a new recipe, for cupcakes, the other week. It's one I've been wanting to trial for a while now. It is for madiera or pound cake [as the Americans call it]. I found it worked brilliantly, in fact, other than being a little dry, I could not tell it was gluten free.

GLUTEN FREE MADEIRA CAKE
1 cup white rice flour
1/2 cup cornstarch
1/4 cup tapioca flour
1 teaspoon baking powder
1/4 teaspoon salt
1/2 teaspoon xanthan gum
170g butter, softened
3/4 cup sugar
1/4 cup milk
3 eggs
the zest of one orange, finely grated
1 tablespoon fresh orange juice

Preheat oven to 180 C.
Cream butter and sugar together with electric mixer until light and fluffy. Add eggs one at a time, mixing well between each addition.
Measure dry ingredients into a bowl, use a hand whisk to combine.
Add dry ingredients. Mix until well incorporated.
Spoon into cupcake cases, and bake for 15-20 minutes, until cakes spring back to the touch.


Ice with butter cream icing flavoured with orange juice [used instead of milk/cream for liquid]. Sprinkle with chocolate shavings.


Wednesday, September 7, 2011

MY FAVOURITE GLUTEN FREE PEANUT BUTTER BISCUITS

Oh how I LOVE these cookies. I eat far too many of them at once. I prefer them cold, out of the fridge, so the chocolate is hard and provides a textural difference to the biscuit crumb. This batch I made with crunchy peanut butter [it was all I had in the pantry] and the extra crunch of peanut pieces was lovely. I don't think I'll go back to smooth peanut butter for these.
GLUTEN FREE PEANUT BUTTER BISCUITS
1 cup peanut butter
1 cup castor sugar
1 egg
1 cup dark chocolate chips
Mix all ingredients in a bowl by hand with a spoon. Form into small cookies. Place on a baking tray and bake at 180 C for approximately 10 minutes. DO NOT ALLOW TO OVERCOOK. Cool on the tray and store in an airtight container in the fridge.

Monday, September 5, 2011

RETRO APRON

The next project for my sewing circle girls [the ladies I'm teaching to sew] is a ruffled half-apron. It's so cute to wear. I feel like a real 1950's housewife. It's a lovely apron to wear over jeans, like putting on a pretty skirt when I cook.
I drafted the pattern myself and will post it if anyone is interested.

Friday, September 2, 2011

FUNKY GROCERY BAGS

A very long time ago I decided to work through a sewing book I own "One Yard Wonders" page by page. Then I realised that I didn't WANT to make all the projects in the book, and my To Do list is so long as it is, I should only make the things I want to. My first project from the book was a grocery tote, which I gave to a friend. I liked it so much that I decided to make a whole heap for myself, because I like the idea of making myself fabric bags I can keep clean, and that make me smile when I use them.
I cut them out at least a year ago and then didn't do anything about it... another UFO. So instead of trying to find a place to keep them, all cut out, I decided to sew them up and store them with my grocery bags. It was a pleasure to use them when I did the groceries last week.