Showing posts with label children. Show all posts

Sunday, September 9, 2012

Miss 3's birthday cakes

 Miss 3 loves yellow.  So for her third birthday we had to have not one, but two yellow birthday cakes.  One for her 'party' with her family, the other for her 'party' with her three little friends. We had yellow balloons, yellow food, and played 'parcel parcel' as she calls it [pass the parcel].
Almost each day since her birthday, I have been told that now she is a 'big girl'.  

Friday, August 31, 2012

Little Red Riding Hood cape

Recently I was delivering the children's address at church, and I needed to recount the story of Little Red Riding Hood to help to illustrate the verse.  I made up this cape to help to illustrate the story.

It was extremely easy.  I used this free pattern and whipped it up in an hour or so.

Now we have a Little Red Riding Hood dress-up.  Very satisfying to run up when I haven't felt motivated to sew anything for a while.

Friday, June 29, 2012

Ideas for school holiday fun

It is the winter school holiday/break now in Queensland.  Two [or three] weeks of no school.  I am definitely going to use some of the 75 ideas from this blog to keep the girls amused and have some fun with them.

I've also been collecting ideas on pinterest for us to do together. 

Usually I choose a few favourites, show the girls, and then they come up with a list of 10-15 activities they want to do too. 

I LOVE school holidays.

Thursday, June 21, 2012

Miss 5's birthday cakes


Cupcakes to share with friends at school.


A pink poodle cake to share with family on the evening of her birthday.


And a train to share with special friends at her birthday party on the weekend after the special day.


Monday, April 23, 2012

Miss 9's birthday cakes


Miss 9 had two cakes this year, the number nine on her actual birthday with the family, and then the fairy princess castle for her party.  She helped to decorate them both, she loves to decorate cakes now.  I have had to let go of my perfectionism to let the girls help to decorate their own birthday cakes, but they love them all the more when they have a hand in decorating them. 


Miss 9 will be doing it all herself in a couple of years I think.  She is very creative. 

Saturday, April 14, 2012

a cute holiday project

I am so proud of Miss 9.  She hand sewed this doll all by herself over the Easter weekend.  Actually it only took her a day.  I found the kits at Aldi and thought it might be a good holiday activity to keep her and Miss 7 busy for a week or so.

I really wish I bought more kits at the time - the holes were pre-punched in the felt, and everything required to complete the doll was in the little box.  Isn't it adorable?

Saturday, March 24, 2012

Miss 7's birthday cakes

The first birthday of the year was this week.  Miss 7 had three birthday celebrations, one with friends at school


One with us on her actual birthday

And she shared a dvd and some craft with three friends last night
I have to say I am OVER cake decorating.  It was a mammoth two days.  I have two weeks to recover before the next birthday...

Sunday, February 26, 2012

A purple nightie for a purple-loving princess

Miss 6 [soon to be 7] is a real princess.  With the exception of her school uniform, she rarely wears anything but dresses, and nighties to bed.  Shorts are too "boy-ish" in her words.

I am often making dresses and skirts for her [and the other girls] but I have always bought their PJ's.  But it is getting increasingly difficult to find modest and/or appropriate PJ's for my girls.  They're either covered in phrases or images I don't think are age-appropriate, or are styles too grown-up for a 6 year old.

So this week I ventured into the world of jersey and sewed my first ever nightie, and for the first time I sewed jersey.  This is actually a test, but because it is purple [her favourite colour] and it has a frill and it fits her, when she tried it on she decided not to take it off!

She has put an order in for another nightie, similar in style but adorned with a rainbow of frills.  I guess that means another trip to Spotlight is in order [Yay!]. 

Sunday, February 5, 2012

multi-zip pencil cases


Have you seen those pencil cases made entirely from zips?  My daughters have, and they thought that this year they would like one.  But then they informed me that those pencil cases that their friends have aren't very useful, because each zip opens into the same big pocket.  They thought it would be far better if we made pencil cases with multiple zips, each opening into a separate pocket.

So I did.

If you want to make one yourself you will need a number of zips, all the same length, and fabric cut into strips the same length, each strip 1 inch longer than the last.

Place two zips right sides together, with the smallest fabric strip behind.  Stitch together with a very narrow seam [2mm or less] using your zipper foot.

Open out the top zip, place the next fabric strip behind, and the next zip on top.


Stitch again with a very narrow seam.  Keep on repeating with zips and increasingly larger strips of fabric.

Open out and press well.  Add a narrow strip to the front of the bottom zip, and a large piece of fabric to the top zip.

The bottoms of the fabric strips will not line up, they need to be trimmed to the same length. 

Make binding or use pre-purchased binding and add to both sides and base of pencil case.

You're done.

Saturday, December 31, 2011

TUTORIAL - Kid's travel activity organisers

I made these activity packs back in September.  They were a desperate attempt to keep the kids busy on the plane.  I had no idea just how useful they would be.  We use them all the time.  They are very simple to make, here's how:


Decide how big/small you want your organiser to be.  I found a notebook I wanted to put in it and added 2 inches to each side.  The first rectangle you need to cut from your main fabric needs to be twice as big as this [the organiser is folded in half].

Pick a main fabric, and one or two contrasting fabrics.

I cut my front piece and lining piece according to my notebook measurement [plus 2 inches each side, and double the width].  The cut pocket strips that were the same width but 1 1/2 inches shorter than the last one.  Hem one long edge of your smaller strips [this will form the top of the pocket].

Lay the pockets one on top of the other and stitch down the centre to hold them together.

Fuse a fairly stiff interfacing to your outside cover piece.
 

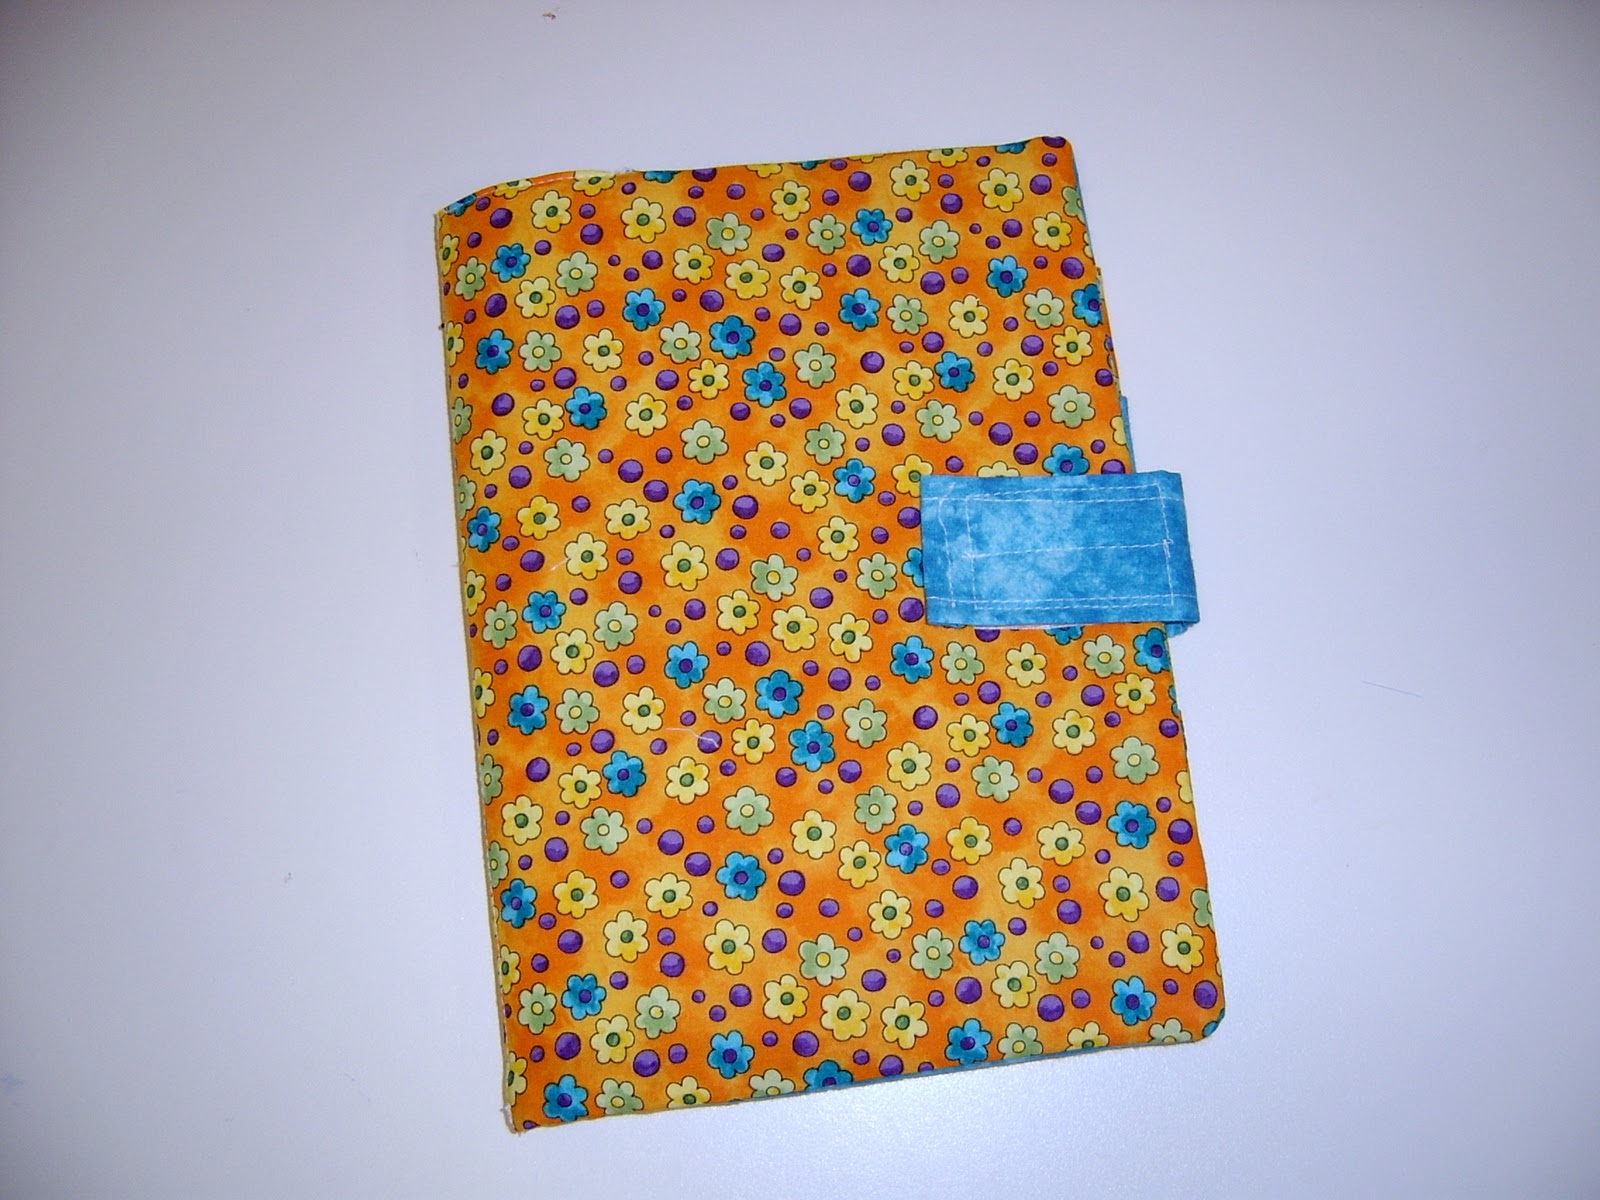
Make a closure tab out of lining/scrap fabric.  Add velcro to the tab...
and to the cover:

Put the pocket pieces and cover right sides together, making sure your closure tab is pinned in the correct place inside this.  Stitch around the outside edge leaving a gap for turning.  Turn, press, and topstitch around the edge.


You are finished.  I made four different ones for my kids, and filled them with notebooks, stickers, books, pencils etc.  They have worked brilliantly on planes, while away on holidays, and at church.  I am considering making a slightly larger one for myself to carry things for me to do while I wait at school and dancing etc.

Wednesday, December 21, 2011

HOMEMADE BARBIE CLOTHES

My niece is getting some lovely new Barbie clothes for Christmas.  She is 5 so she needs clothes that are easy to put on and take off.  So I googled free Barbie clothes patterns, printed the patterns and cut out some fabric scraps.

I have never sewn something so small and fiddly before... it was extremely satisfying to complete, but it's not the neatest job I've ever done.  At some stage I will need to make some outfits for my girls' Barbies, but that means 4 sets.  I think I'll have a break from Barbie outfits for a while!

Sunday, December 18, 2011

Sewing clothes is fun again.

During my absence from the blog world, I have rediscovered my love for garment sewing.  Being constantly frustrated with the lack of decent clothes in stores has helped me to start sewing again.  I have sewn clothes for all my children, myself, and others.  It has been so much fun, but of course the more I sew, the longer my 'to do' list seems to become!  This is an outfit I made for Miss 4, shorts and a swing top/pillowcase top.  I actually made two identical outfits, one for her and one for my niece, Miss 5.  It's really cute.

I haven't taken photos of the 9 pairs of shorts, 6 skirts, and one after-5 outfit I have made.  I guess I was too busy sewing and then we have been too busy wearing them.  At some stage I will take photos of the bridesmaid dresses that are progressing well. 

If you've never made your own clothes, don't be afraid of having a try.  It's really not that difficult.  Sometimes I use commercial patterns, sometimes I draft my own, sometimes I just cut into the fabric.  It really depends what I am making.  The main thing is to practice.  Start with some kid's clothes, they take less fabric and don't have to fit as well as adult's clothing.  But then move on to a basic skirt or something else for yourself.  You have control over the fabric, the style, and your clothes will be unique.

I have been sewing for over 20 years.  I am so thankful I learnt to sew a long time ago.  You would not believe the number of times I have had to unpick a seam, or throw something out because I had stuffed up.  I still unpick regularly.  But with each mistake, I learn something else, and hopefully won't make that same mistake again.  Making mistakes and unpicking is part of sewing, especially garment sewing.  But I have learnt to embrace that, rather than throw in the towel when I do make a mistake.  Sewing clothes is fun again.

Wednesday, September 21, 2011

KID'S TRAVEL ACTIVITY ORGANISERS

I remember going places as a child with my 'busy bag'. Mum put together a bag for myself and my sister that contained a little doll, pencils and paper, a puzzle, and I forget what else. We loved playing with them: on holidays, at people's houses, at church. Sometimes we'd ask Mum to get them out for us to play with at home.
When preparing for our recent trip to Sydney I decided that we needed a variation of this for on the plane.  All four girls would need to be occupied for a considerable time, with only their tray table to work on.  Here is what I made up for them:

I filled them with notebooks, puzzle/colouring books, stickers, a new book [picture book or novel], a few coloured pencils, a lead pencil and rubber.  They were a hit.  I whipped up four over two evenings, no sweat.  And the best part is, they can be used over and over at church, when waiting in the car, other holidays. 

I will post a tutorial soon.  I'm thinking I may need my own, it's just the right size to fit in my bag, and better than any organiser I've ever owned.  You could customize it with pockets etc. to suit your own needs.